
Airtable’s powerful database capabilities become even more valuable when connected to your other business tools. With Zapier’s automation platform, you can create seamless workflows that sync data between Airtable and thousands of other applications—from Gmail and Slack to Shopify and HubSpot.
This guide walks you through everything you need to know about integrating Airtable with other services using Zapier. You’ll learn how to set up automated workflows, explore practical examples, and discover ways to streamline your business processes without any coding knowledge.
What is Zapier and How Does it Work with Airtable?
Zapier is an automation platform that connects different apps and services through automated workflows called “Zaps.” Each Zap consists of two main components: a trigger (an event that starts the workflow) and an action (what happens as a result).
When you integrate Airtable with Zapier, you can use your database as either the trigger or the action app. For example, you might create a Zap where adding a new record to Airtable automatically sends a notification email, or where submitting a form on your website creates a new record in your Airtable base.
The beauty of this integration lies in its flexibility. You can connect Airtable to over 5,000 apps, including popular tools like:
- Google Sheets and Google Calendar
- Slack and Microsoft Teams
- Mailchimp and ConvertKit
- Typeform and JotForm
- Trello and Asana
- Salesforce and HubSpot
Setting Up Your First Airtable-Zapier Integration

Before creating your first Zap, you’ll need accounts with both Zapier and Airtable. Once you’re logged in to Zapier, click “Create Zap” to begin building your automation.
The setup process involves connecting your Airtable account to Zapier through OAuth authentication. This secure connection allows Zapier to access your bases and tables while maintaining your data privacy.
During the connection process, you’ll need to:
- Authorise Zapier to access your Airtable account
- Select the specific base and table you want to work with
- Choose which fields to include in your automation
- Test the connection to ensure everything works properly
Using Airtable as a Trigger: Automate Actions When Data Changes
When Airtable serves as the trigger app, you can automate responses to database changes. This is particularly useful for notifications, data synchronisation, and workflow management.
Example: Email Notifications for New Records
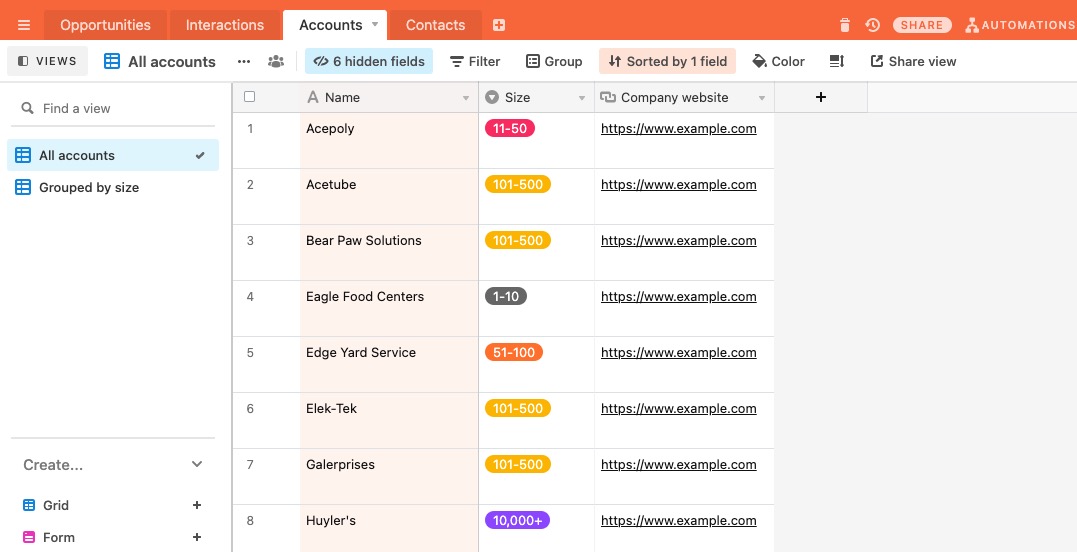
Image – Source
Let’s say you’re managing client accounts in Airtable and want to receive email notifications whenever a new account is added. Here’s how to set this up:
Step 1: Configure the Trigger
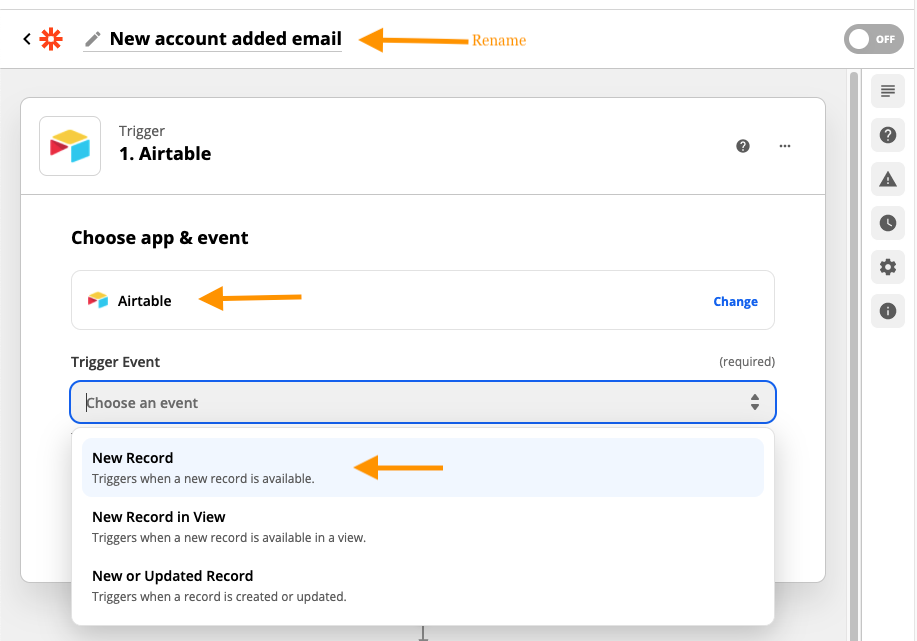
- Select Airtable as your trigger app
- Choose “New Record” as the trigger event
- Connect your Airtable account and select your base and table
- Test the trigger to ensure it’s working correctly
Step 2: Set Up the Email Action
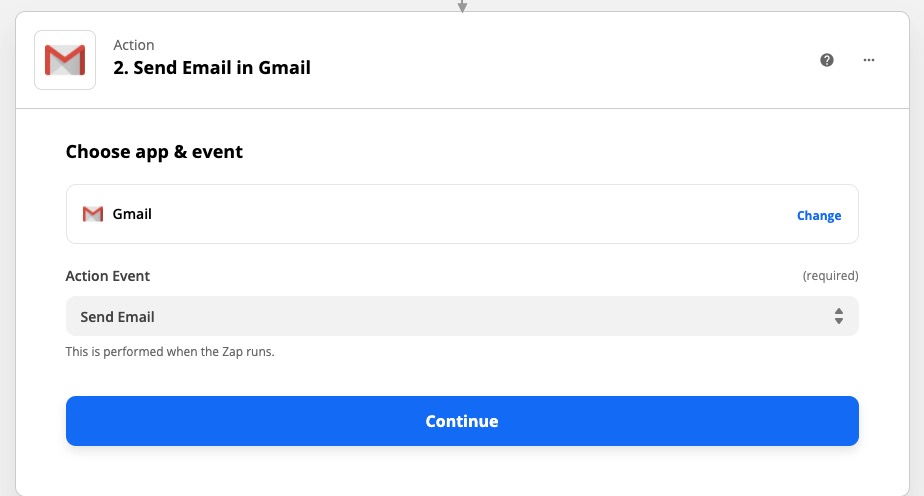
- Choose Gmail, Outlook, or “Email by Zapier” as your action app
- Select “Send Email” as the action
- Connect your email account to Zapier
- Create your email template using both static text and dynamic data from the new Airtable record
The dynamic data feature is particularly powerful—you can include information from the new record directly in your email. For instance, if someone creates a new client record, your notification email can automatically include the client’s name, email address, and any other relevant details.
Advanced Trigger Applications
Beyond simple notifications, you can use Airtable triggers for more sophisticated workflows:
- Project Management: When a project status changes to “Complete” in Airtable, automatically create a new task in your project management tool for the next phase
- Customer Service: When a new support ticket is logged in Airtable, automatically assign it to the appropriate team member in Slack
- Sales Processes: When a lead’s status changes to “Qualified” in Airtable, add them to a specific email marketing campaign in Mailchimp
Using Airtable as an Action: Collect Data from Multiple Sources

When Airtable serves as the action app, you can automatically populate your database with information from other platforms. This approach is excellent for data collection and centralising information from various sources.
Example: Logging Social Media Posts
Suppose you want to track all your Instagram posts in an Airtable base for content analysis. Here’s how to automate this process:
Step 1: Set Up the Instagram Trigger
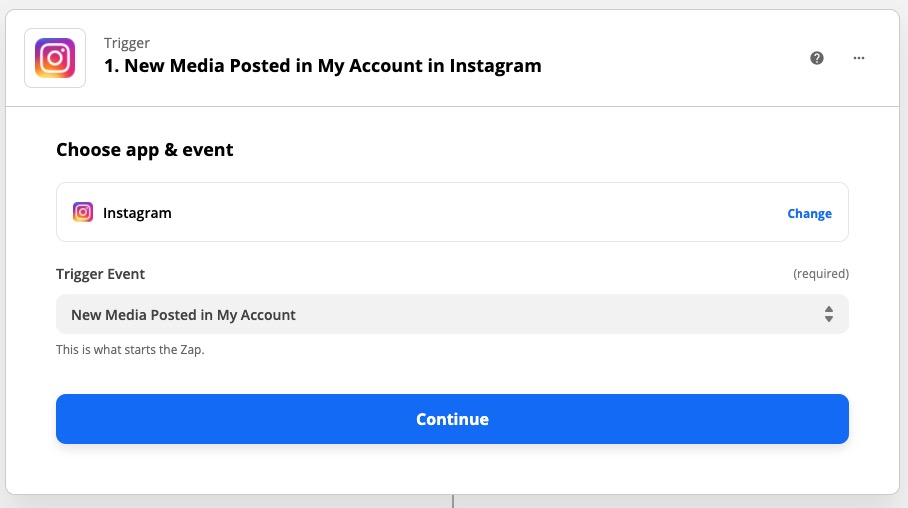
- Select Instagram as your trigger app
- Choose “New Media Posted by You” as the trigger event
- Connect your Instagram account to Zapier
- Test the trigger to ensure it detects your posts
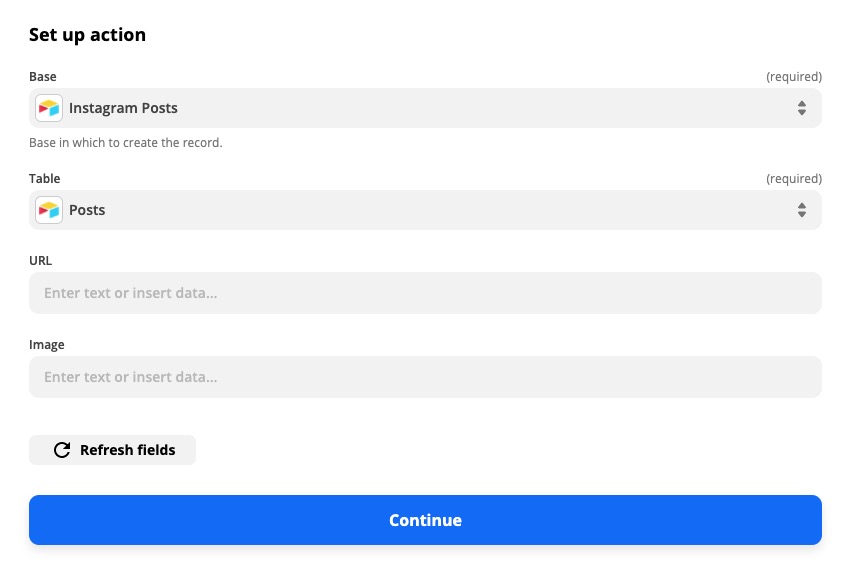
Step 2: Configure the Airtable Action
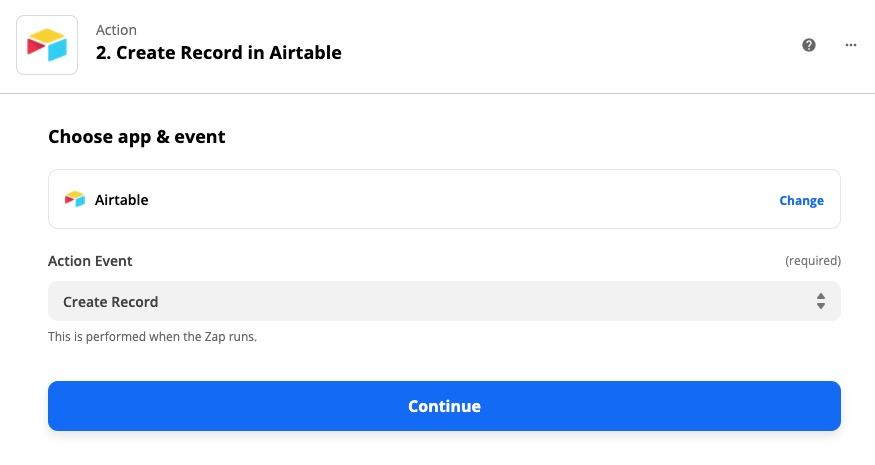
- Select Airtable as your action app
- Choose “Create Record” as the action
- Connect your Airtable account and select your content tracking base
- Map Instagram data to your Airtable fields (post URL, image, caption, posting date, etc.)
This automation ensures every Instagram post is automatically logged in your database, complete with all the metadata you need for content analysis.
Other Data Collection Applications
The possibilities for collecting data in Airtable are virtually endless:
- Lead Generation: Automatically add form submissions from your website to your CRM base
- Event Management: Create attendee records in Airtable when people register through Eventbrite
- E-commerce: Log new orders from Shopify or WooCommerce for inventory and customer management
- Survey Responses: Import responses from Typeform or Google Forms for analysis and follow-up
Best Practices for Airtable-Zapier Integrations
To get the most out of your integrations, follow these best practices:
Plan Your Data Structure
Before creating Zaps, ensure your Airtable base is properly structured. Consider which fields you’ll need for integrations and how data from other apps will map to your existing structure. Consistent field names and data types will make your automations more reliable.
Use Filters and Conditions
Zapier allows you to add filters and conditions to your Zaps, preventing unnecessary actions and keeping your data clean. For example, you might only want to create Airtable records for form submissions that include specific information or meet certain criteria.
Test Thoroughly
Always test your Zaps before activating them. Create sample data in your trigger app and verify that the correct information appears in Airtable with proper formatting. This prevents data issues that could be time-consuming to fix later.
Monitor and Maintain
Regularly review your active Zaps to ensure they’re working correctly. Check for failed automations and update your workflows when you make changes to your Airtable structure or connected apps.
Advanced Integration Techniques
Once you’re comfortable with basic Zaps, you can explore more advanced features:
Multi-Step Zaps
Multi-step Zaps allow you to create more complex workflows. For example, you might create a Zap that finds an existing Airtable record, updates it with new information, and then sends a notification if certain conditions are met.
Webhooks
For real-time integrations, you can use webhooks to trigger Zaps immediately when specific events occur in Airtable or other apps. This is particularly useful for time-sensitive workflows.
Custom Fields and Formatting
Zapier includes formatting tools that let you manipulate data before it reaches Airtable. You can reformat dates, extract specific parts of text strings, or perform calculations on numerical data.
Troubleshooting Common Issues
When working with Airtable-Zapier integrations, you might encounter some common challenges:
Authentication Problems: If your Zap stops working, check whether your app connections are still valid. You may need to reconnect your accounts periodically.
Field Mapping Issues: Ensure that the data types in your source app match the field types in Airtable. For example, trying to insert text into a number field will cause errors.
Rate Limits: Both Airtable and connected apps have rate limits. If you’re processing large volumes of data, you might need to implement delays or batch processing.
Maximising Your Workflow Efficiency
Zapier integrations transform Airtable from a powerful database into the central hub of your business operations. By automating data entry, notifications, and cross-platform synchronisation, you can focus on higher-value activities while ensuring your information stays current and accessible.
Start with simple automations like email notifications or form submissions, then gradually build more complex workflows as you become comfortable with the platform. The time you invest in setting up these integrations will pay dividends in increased productivity and reduced manual work.
Ready to streamline your processes? Begin by identifying repetitive tasks in your current workflow that involve moving data between Airtable and other apps—these are perfect candidates for your first Zapier automations.